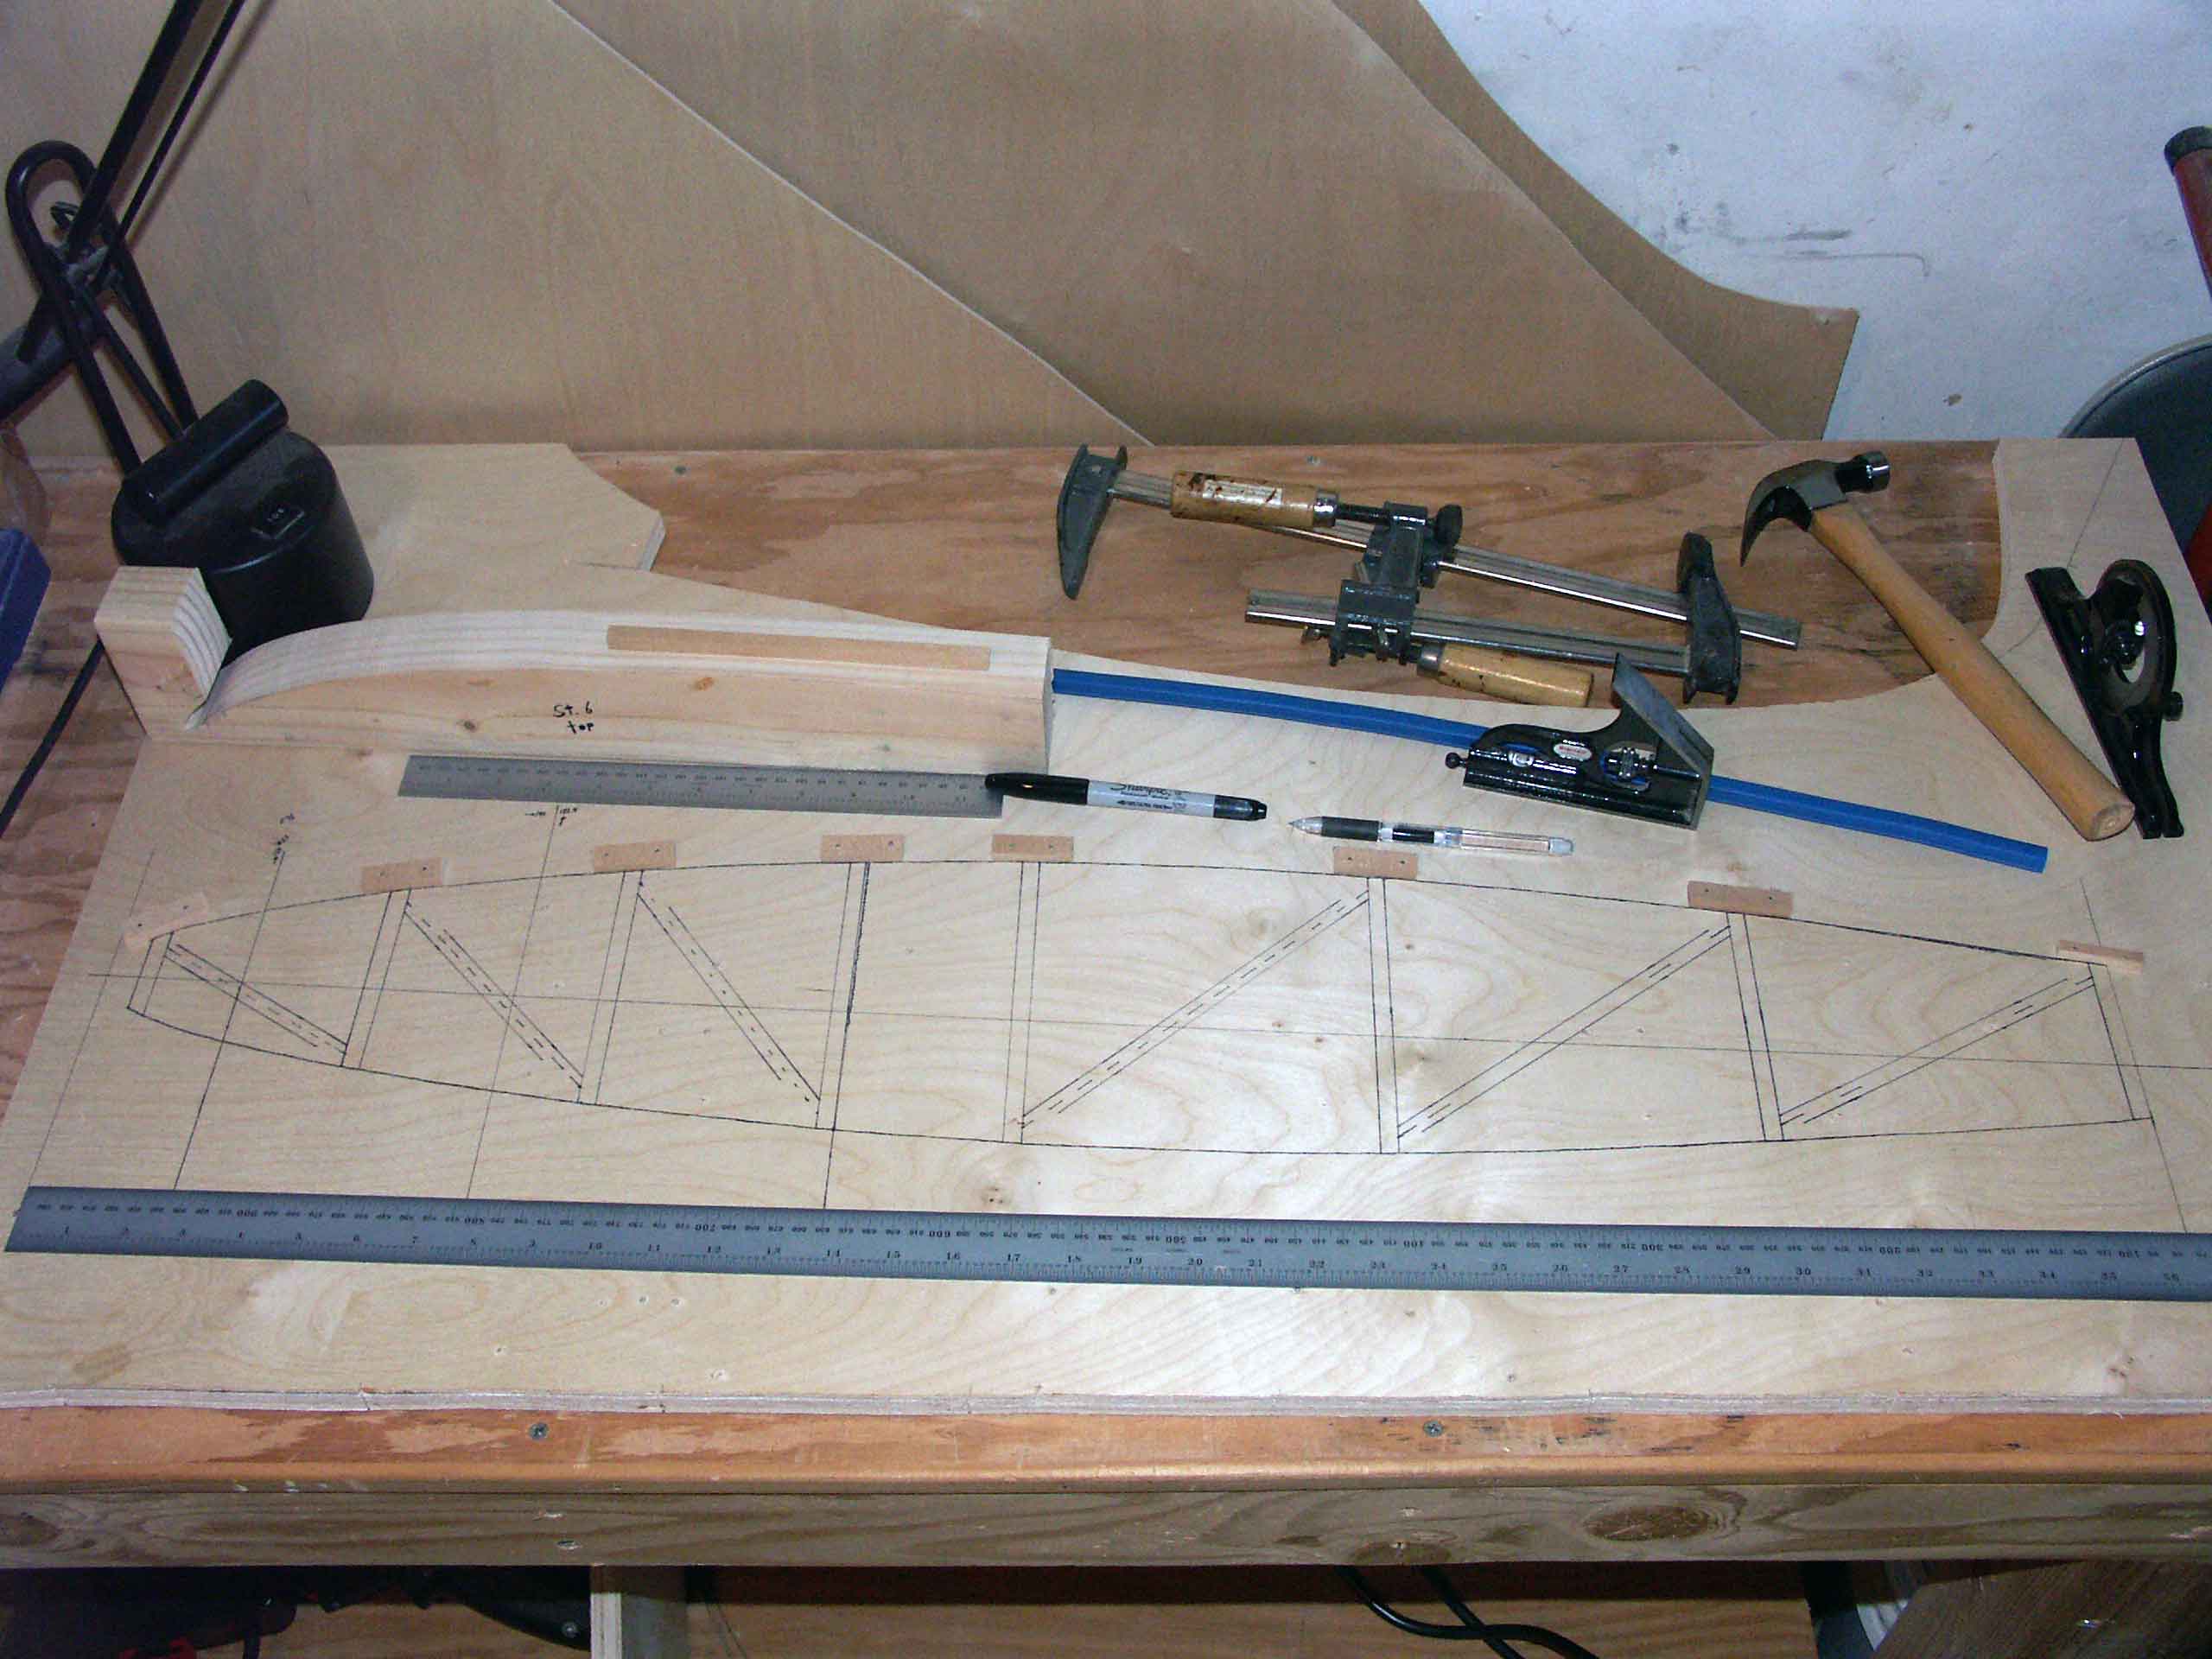
I've decided to go with the tried and true method for wing rib jigs. Starting with the straightforward wing rib at station 6, I transferred the blueprint to the plywood by punching little holes through the blueprint to the plywood like I did with the tail wing tip bows. I made sure to also punch through the reference line so I could check the measurements of my transferred rib. Since the rib is cambered, there is no true rib centerline so all the blueprint measurements are from a reference line below the rib. In the picture below, the ruler is on the reference line. The transferred rib checked out ok so I connected the dots freehand with an ultra fine point sharpie. My dots were really close together so it was easy to freehand, about one every 10-20 mm. Then I measured out where all the diagonals go and drew them in, making sure the vertical ones were perpendicular to the reference line. I also measured and drew the rib chord line. I tried out putting in the forming blocks along the top capstrip. I used 6 mm tall blocks wide enough not to split when I nailed them down with brads. These capstrips are made from 12 mm tall spruce so I can glue on the plywood gussets while gluing the rib structure with the 6 mm blocks.

I also made a capstrip pre-bending jig for the top capstrip. When I get the wood, I can pre-bend the top one and check to see if I'll need to make a different pre-bending jig for the bottom capstrip, or if the top bending jig will work for the bottom as well. I want to make one full rib with this method before I try streamlining the process to see if anything needs changing.
| Wing Parts Menu | Home